 |
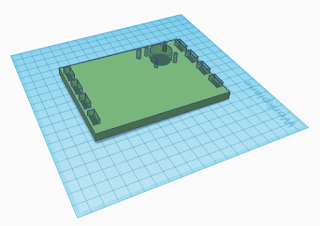
| The top piece described in the left paragraph |
This week I took another swing at the chassis, this time focusing on the housing area for the Arduino. In previous iterations I have used a sort of lego snap together method for assembling, and I feel as I have now refined this style with my current designs. You will notice that the top is already shapped for a fan even with holes to fasten it down and to pass the power chord through. It is currently printing, and I am excited to see how it comes out.
As for the bat work, James and I met together this week and found a platform that lets us do a drag and drop method of building the site. It may not be the most nuanced as it is hand-written, but it is currently to help provide a proof of concept. With that in mind it might be sometime till I feel it is something I can showcase here, but it is in the works.
 |
| All designs are CAD models, intended for 3d printing and exported as a .stl |
In other news, I am currently prepping for a STEM fair of sorts hosted by the Diamondback at Chasefield. Hearing about it last week, I ordered quite a handful of parts and began assembly on a simple arduino controlled rc that is housed in just a cardbox. As unremarkable as it sounds, I am actually looking to outfit it. Currently I have attached a motion sensor and a bit of a gag external device (as per James request), so when I showcase it next thursday it will be quite a lot of fun.


I believe my "gag" element to the device is a great addition to the bot. It gives it character, but I might be stealing that back for my own creation. His name will be BeefBoss and it’ll be great. I’m going to take that extra box we have and convert it to a drive-able box like you did and have it make noises.
ReplyDeleteI'm glad that you're still working on the Arduino. The program for building the site certainly sounds useful. Are the pictures from it? They look great, very clean. I bet those could be very helpful for presentation. What is the purpose of the motion sensors?
ReplyDelete